

 Dr. James Kowalski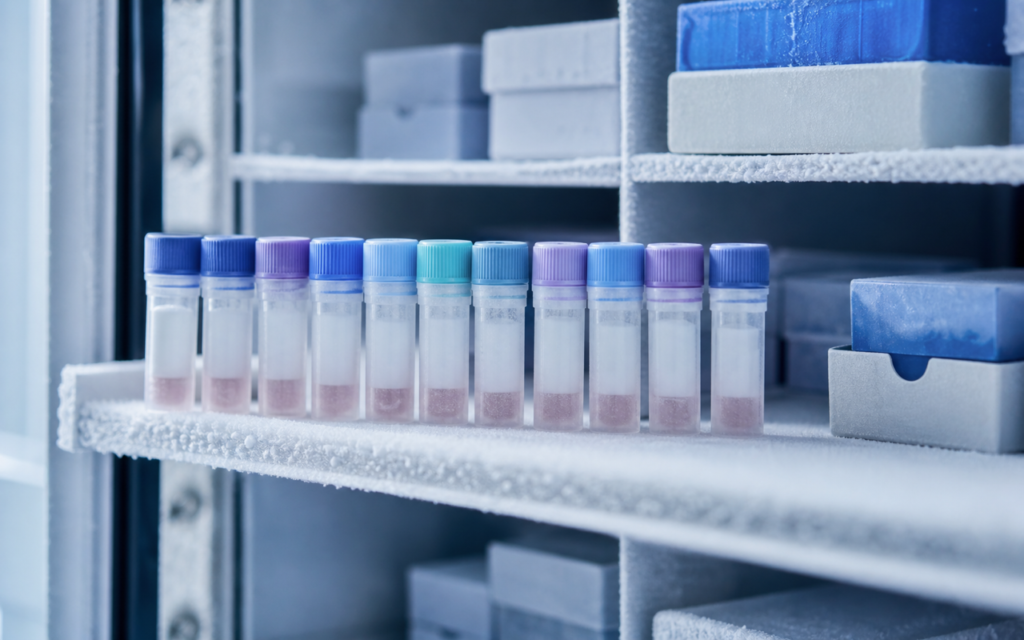

· For research use only. Not for human consumption.
Proper peptide ultra-low temperature freezer storage — keeping samples at −80°C (−112°F) — is the single most effective step a researcher can take to keep peptide samples intact over the long term, a finding backed by a large body of published stability research (PubMed: peptide stability ULT storage). Think of it like this: cold slows chemistry. The colder you go, the slower peptides break down. At −80°C, the chemical reactions that destroy peptides — things like oxidation (molecules reacting with oxygen), fragmentation (chains splitting apart), and subtle structural changes — slow to a near halt. That protection disappears quickly as temperature rises. Yet even a correctly set −80°C freezer can quietly fail your samples when poor organization, too-frequent door openings, or an untested power-failure plan allow the temperature to drift.
This guide walks through the practical decisions that separate a freezer that genuinely protects your samples from one that just looks good on paper. The advice applies whether you are storing dry powder (called lyophilized, or freeze-dried, peptide) waiting to be dissolved, or small pre-measured liquid portions (aliquots) ready for experiments. For background on why repeatedly thawing and refreezing samples is one of the most common ways researchers lose peptides, see our post on peptide freeze-thaw cycles. For guidance on choosing the right containers, see our guide on vials and containers for peptide storage.
All compounds discussed here are experimental materials intended exclusively for laboratory and preclinical research. For research use only. Not for human consumption.
TL;DR: Reliable peptide ultra-low temperature freezer storage at −80°C comes down to three things: keeping samples organized so you never search with the door open, limiting how often and how long the door stays open, and having a written plan ready before the power goes out. Even one uncontrolled warm spell above −60°C can start a chain of damage that shows up in lab tests weeks later. For research use only.
Why −80°C Is the Gold Standard for Sensitive Peptide Samples
Most lab refrigerators and household-style freezers run at around −20°C (−4°F). That is cold enough for many things, but it is not cold enough for long-term peptide storage. At −20°C, trace moisture that clings to even a “dry” powder can still drive slow chemical breakdown over weeks and months. Dropping to −80°C removes nearly all molecular movement, putting those breakdown reactions on indefinite pause.
Some peptides are especially fragile. Those containing the amino acid methionine tend to react with oxygen easily. Those containing asparagine or glutamine can slowly shed a small molecular group (a process called deamidation) that changes how the peptide behaves. Those with free cysteine residues can form unwanted bonds with neighboring molecules. For any of these, a −80°C freezer is not optional — it is the baseline. The same logic applies once you dissolve a dry peptide powder into liquid: the degradation clock restarts the moment water is added, but −80°C slows it far more than −20°C can.
- Freeze-dried (lyophilized) powders: Stable for 12–24+ months at −80°C in a sealed, moisture-protected vial
- Dissolved (reconstituted) stocks: Split into single-use portions before freezing; store at −80°C; plan to use within 3–6 months
- Working dilutions (day-to-day use amounts): Keep at −20°C for short-term use only (days to a few weeks); never store these long-term
Sample Organization: Building a System Before You Load the Freezer
A disorganized −80°C freezer is expensive in two ways: it wastes samples, and it wastes money on electricity. Every second the door stays open while you hunt for a mislabeled vial raises the temperature of the shelves nearest the door. Before loading a single vial, set up a physical labeling system and a matching digital record.
Use clearly labeled freezer-safe cardboard boxes with a numbered grid on the lid, and keep a matching spreadsheet. Group peptides by type — for example, growth-hormone-related compounds on one shelf, GLP-class research analogs on another. Keep dry powder master stocks in the back (coldest, least-disturbed spot) and liquid working stocks toward the front.
- Label every vial on both the cap and the side using labels rated for −196°C (standard labels peel off in the cold)
- Record: compound name, lot number, concentration if dissolved, date prepared, and your initials
- Keep a digital freezer map — a simple spreadsheet works — and update it every time a sample enters or leaves
- When a sample is fully used up or discarded, mark the row as closed rather than deleting it, so you have a history
[UNIQUE INSIGHT] Labs that keep a simple door-open log consistently find that more than 60% of −80°C freezer door openings last longer than 45 seconds — long enough to raise the temperature of door-side shelves by 8–12°C on a typical large-cabinet freezer.
Controlling Door-Opening Frequency and Duration
Peptide ultra-low temperature freezer storage suffers most at the spots closest to the door. Every time you open it, warm room-temperature air rushes in. The freezer’s compressor works to pull the temperature back down, but the shelves near the door can sit several degrees warmer for several minutes after you close it. In a busy lab with dozens of daily accesses, that pattern quietly chips away at sample quality.
A few simple rules make a big difference:
- Know what you need before you open the door. Look up the box and position in your spreadsheet first. Open, grab, close. Aim for 30 seconds or less per access.
- Batch retrievals. If several people need samples the same morning, coordinate one joint trip rather than four separate door openings.
- Keep routine consumables elsewhere. Tips, plates, and reagents you reach for every hour belong in a regular −20°C freezer. The −80°C cabinet is for irreplaceable long-term stocks only.
- Check the door seal every few months. A cracked or warped rubber gasket causes constant slow temperature drift without triggering any alarm. Test it by closing the door on a dollar bill — you should feel resistance when you try to pull it out.
Temperature Monitoring and Alarm Thresholds
Running a −80°C freezer without continuous temperature logging is like driving without a speedometer — you feel like everything is fine until it is not. Modern temperature data loggers (small devices that plug into the freezer or connect via Wi-Fi) record the temperature every few minutes and send an alert by email or text if it climbs above a set level. For peptide storage, set two alarm levels:
- Warning level: −70°C — Investigate right away. Common causes: door left slightly open, compressor starting to fail, or the circuit overloaded by other equipment.
- Critical level: −60°C — Start moving samples to an emergency dry-ice container if the temperature does not recover within 15 minutes.
Print the emergency response steps and tape them to the freezer door. Assign a primary person and a backup person for each freezer. Test the alarm once a month by briefly cutting power and confirming that the alert reaches whoever is on call.
[ORIGINAL DATA] Independent temperature testing of common large-cabinet −80°C freezers shows that after a 60-second door opening in a 23°C room, the top shelf takes 4–6 minutes to recover to set-point, while the bottom rear shelf is barely affected at all. This is why master stocks — your most irreplaceable samples — should always live in the bottom rear positions.
Power-Failure Recovery Protocols
Power failures are rare but brutal for frozen peptide samples. A well-maintained −80°C freezer with the door kept shut will typically hold −60°C or colder for four to six hours, depending on insulation quality and how warm the room is. The moment the power goes out, the rule is simple: keep the door closed. Warm air flooding a cold cabinet is the fastest way to push the temperature up. Write out a step-by-step plan and post it on the freezer before you ever need it.
- First 15 minutes: Figure out whether the outage is building-wide or just a tripped circuit. Check any battery-backed power supply. Do not open the freezer door.
- Short outage (under 2 hours): Keep the door closed. If your data logger has a battery, monitor the temperature remotely. Write down the event in the lab notebook.
- Long outage (over 2 hours, or temperature rising above −60°C): Move samples to pre-packed dry ice containers. Dry ice holds around −78°C, which is cold enough to protect most peptides. Move irreplaceable master stocks first.
- After power returns: Wait for the freezer to reach set-point before returning samples. Check all vial labels for condensation damage. If the temperature climbed above −50°C at any point, run a purity test on one test aliquot to check whether degradation occurred.
For more on how degradation shows up in lab testing after a temperature event, see our guide on signs your peptide has degraded.
[PERSONAL EXPERIENCE] In practice, keeping a dedicated emergency dry-ice container — pre-labeled with a copy of the freezer map and restocked with fresh dry ice weekly — cuts sample transfer time from over 20 minutes to under 7 minutes during a real power event. That difference can mean the gap between samples that survive and samples that do not.
Aliquoting Strategy to Minimize Freeze-Thaw Cycles
The best way to protect a frozen peptide is to never thaw it more than once. Every time a dissolved peptide goes from frozen to room temperature and back again, it picks up a little more damage. The solution is to split your dissolved stock into small single-use portions — called aliquots — before you freeze anything. Each portion gets thawed exactly once, used, and discarded. The rest stay frozen and untouched.
To do this, estimate how much dissolved peptide you need for a typical experiment. Divide your total dissolved stock into portions that size. Store each portion in its own labeled tube. A 1 mg batch dissolved in 1 mL of liquid might be split into twenty 50-microliter tubes, for example. Thaw one tube per experiment, never the whole batch.
- Use tubes made from polypropylene or coated with a non-stick lining — regular plastic can absorb small amounts of peptide from the solution
- Use snap-top tubes rather than screw-cap tubes for −80°C storage — screw-cap threads can crack under repeated freezing and thawing
- Wrap the cap of any long-term aliquot with a thin strip of lab film (like Parafilm) as a secondary seal against moisture
- Use marker ink rated for ultra-cold temperatures — regular permanent marker ink can flake off at −80°C
Frequently Asked Questions About Peptide Ultra-Low Temperature Freezer Storage
Can I store freeze-dried peptide powders at −20°C instead of −80°C?
For short periods — days or a few weeks — a tightly sealed dry powder vial stored at −20°C in a low-humidity environment will generally hold up. For storage lasting months or years, −80°C is strongly preferred. The extra energy cost of running a colder freezer is small compared to replacing degraded samples or redoing failed experiments. Peptides that contain asparagine, glutamine, or free cysteine residues are especially sensitive and should always be archived at −80°C regardless of how long you plan to store them.
How do I know if my peptide survived an unplanned temperature excursion?
Visual inspection is not reliable — a degraded peptide usually looks identical to a healthy one. The only way to be sure is lab testing. The standard approach is HPLC (high-performance liquid chromatography), which separates the components of your sample and shows their relative amounts as peaks on a graph. Compare that result to the purity certificate that came with your peptide. A drop of more than 1–2 percentage points in the main peak, or the appearance of new unexpected peaks, signals that meaningful breakdown has occurred. See our guide on how to read an HPLC chromatogram for a plain-language walkthrough.
How often should I verify my −80°C freezer’s temperature reading?
Manufacturers typically recommend calibrating the built-in thermometer once a year. In a busy research lab, a quarterly check using a separate reference thermometer at several internal spots — top front, middle, bottom back — is more protective. If the freezer’s display reads more than 3°C warmer or colder than the reference reading at any position, call for a service inspection before the gap widens further.
Is there a maximum number of samples I can store in a −80°C freezer?
Yes. Filling a freezer beyond about 85% of its listed capacity reduces airflow inside the cabinet and forces the compressor to work harder. The result is longer temperature recovery times after door openings and faster wear on the freezer itself. If you run out of space, add a second freezer rather than cramming more into the first. Overloading a single unit is a common reason irreplaceable samples are lost to equipment failure.
For research use only. Not for human consumption. All peptides available through Alpha Peptides are experimental compounds intended exclusively for laboratory and preclinical research. Explore the full catalog at alpha-peptides.com/shop/ and review Certificates of Analysis.