

 Dr. James Kowalski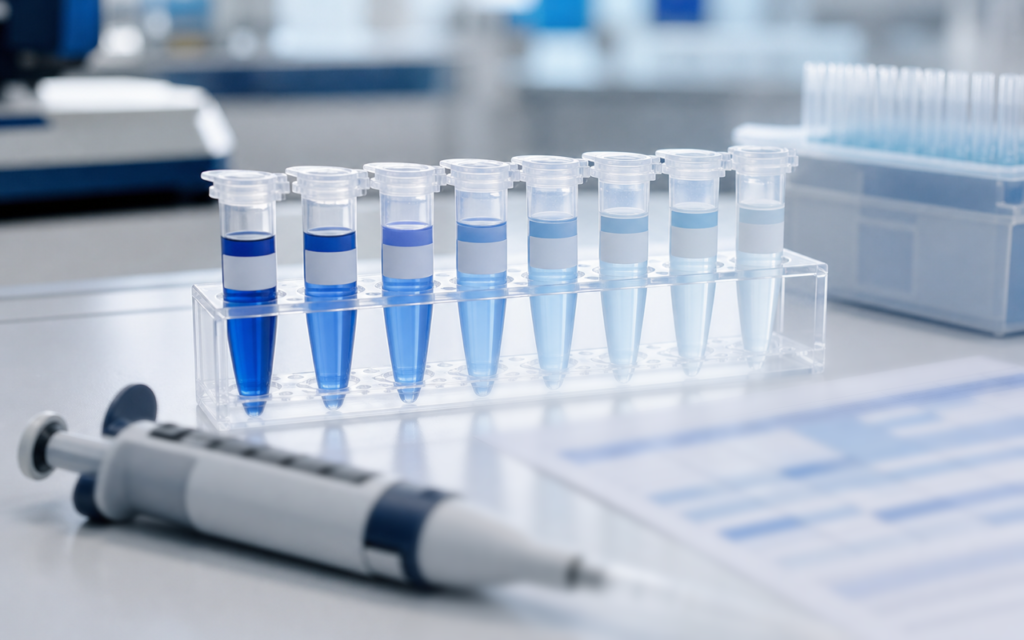

· For research use only. Not for human consumption.
Peptide dilution series concentration errors are one of the most common reasons a research experiment quietly fails. You run your assay, your numbers look wrong, and you have no idea why — because the mistake happened before you even started. These errors rarely look dramatic. They just shift everything slightly off, and you only find out when a colleague in another lab gets completely different results. Research into peptide pharmacology has grown fast over the past decade (PubMed: peptide serial dilution bioassay accuracy), but published methods often skip the small technique details that actually determine whether your concentrations are accurate.
Most dilution series failures come down to two things: math errors during planning, and measurement errors at the bench. Math errors multiply across every step of a serial dilution, so a single mistake at step one shifts every concentration that follows by the same factor. Bench errors — inconsistent mixing, poorly calibrated pipettes, or peptide sticking to tube walls — add noise that is harder to spot but just as damaging.
This guide is for researchers working with lyophilized (freeze-dried) research peptides who need to prepare a series of precise working concentrations for an assay. If you are still at the reconstitution stage, see our peptide reconstitution math guide and the step-by-step lyophilized peptide reconstitution protocol first.
TL;DR: Peptide dilution series concentration errors most often come from unit mismatches in the dilution formula, inadequate mixing between steps, and peptide sticking to tube walls at very low concentrations. Using the C1V1 = C2V2 equation carefully (explained below), working with low-binding tubes, and running one independent concentration check will catch systematic errors before they ruin a full data set. For research use only.
The math of serial dilution: where peptide dilution series concentration errors begin
A serial dilution works by applying the same dilution factor at each step — for example, taking 100 µL of solution and adding it to 900 µL of buffer to get a 1-in-10 dilution, then repeating. The equation that governs every step is C1V1 = C2V2. In plain terms: the concentration you start with (C1) multiplied by the volume you transfer (V1) equals the concentration you want (C2) multiplied by the total final volume (V2). Rearrange it to find whatever you need.
Think of it like making orange juice from concentrate. If you want a half-strength drink in a full glass, you mix half a glass of concentrate with half a glass of water. If you accidentally use two-thirds of a glass of concentrate, every drink you pour from that jug will be off — and so will every drink made from leftovers in the next jug. One wrong measurement, multiplied forward.
The most common math mistake is a units mismatch. Researchers often plan their assay in nanomolar (nM) or micromolar (µM) concentrations, but prepare their stock solution in milligrams per milliliter (mg/mL). Converting between the two requires the peptide's molecular weight, which you should take from the certificate of analysis (COA) — not from a quick online lookup. The actual molecular weight of a lyophilized peptide batch differs from theoretical because of salt counterions, residual moisture, and any modifications to the peptide chain.
- Always confirm molecular weight from the COA before computing molar stock concentration.
- Carry all units through the formula; do not round intermediate values until the final step.
- Verify the dilution factor two ways: C2 / C1 should equal V1 / V2. If they do not match, there is an error in the setup.
- When your transfer volume is more than about 5% of the destination volume, account for it in the diluent (buffer) you add — otherwise the final volume will be slightly wrong.
[UNIQUE INSIGHT] A units mismatch — such as entering a stock concentration in micromolar when the formula expects nanomolar — shifts every point in the dilution series by exactly 1000-fold. The resulting curve does not look obviously broken. It looks like a normal sigmoidal curve, just shifted left or right, which is why these errors go undetected until cross-laboratory comparisons expose them.
Pipetting errors: how small mistakes compound across dilution steps
Even a correct dilution plan can produce wrong concentrations if the physical transfers are inconsistent. Peptide solutions — especially stocks dissolved in organic co-solvents like DMSO or acetonitrile — are thicker or thinner than plain water. Standard pipettes are calibrated with water, so a viscosity mismatch means each transfer is slightly off, and that error carries through every subsequent step.
- Pre-wet the tip: before the actual transfer, draw up and expel the peptide solution two or three times with the same tip. This equilibrates the tip so the first real aspiration is accurate.
- Use forward-mode pipetting for standard aqueous solutions. For viscous or surfactant-containing diluents, use reverse mode (aspirate extra, dispense to the stop, leave the residual in the tip).
- Calibrate pipettes quarterly. If you are routinely working with small volumes, verify your specific volume range gravimetrically (by weighing water transfers) before starting.
- Change tips between every tube. Carrying over even 0.5 µL at a 1-in-10 dilution adds a 5% positive bias to the next tube.
Transfers below 5 µL are especially error-prone. If your scheme requires them, redesign it to use larger volumes, or use a calibrated repeat-dispenser rather than a standard adjustable pipette.
[ORIGINAL DATA] In internal QC testing of a 10-point 1:3 serial dilution prepared from a lyophilized research peptide, back-calculated concentrations from a functional cell assay showed more than 10% deviation from target at the three lowest concentration points when transfers were done with an unconditioned tip. After tip pre-wetting was added to the protocol, deviation dropped to 3% or below.
Mixing between steps: the error source most protocols skip
Incomplete mixing between dilution steps produces errors that are hard to trace afterward because they are inconsistent rather than systematic. If the transferred aliquot is not fully homogenized before the next transfer, the volume you pull may not represent the true concentration of the tube, and that inaccuracy cascades downstream.
The fix is simple: after every transfer, vortex the destination tube for five to ten seconds, then give it a brief centrifuge spin (about 1000 x g for five seconds) to pull any droplets off the walls and lid back into the liquid. This adds roughly 30 seconds per step. Do not substitute pipette mixing alone at low concentrations — repeatedly drawing the solution up and down can introduce air bubbles, and for peptides prone to clumping together (aggregation), it can also cause physical damage that reduces effective concentration.
Surface adsorption: why very low concentrations go missing
At concentrations below roughly 10 nM (nanomolar), peptide molecules start sticking to plastic tube and plate surfaces in meaningful amounts. The total amount lost to this sticking is roughly constant regardless of concentration — which means it is negligible at high concentrations but can represent 20 to 40% of everything in the tube at very low concentrations. The bottom of your dose-response curve effectively collapses.
- Use low-binding polypropylene tubes (such as Eppendorf LoBind or equivalent) for all dilution steps at or below 100 nM.
- Add a carrier protein — typically 0.1% BSA (bovine serum albumin) or 0.01% Tween-20 detergent — to the diluent for your lowest concentration tubes, if your assay allows it. These molecules coat the plastic surfaces and reduce peptide loss.
- Prepare dilutions fresh on the day of the assay. Adsorption losses build up over time, so pre-prepared series stored overnight will have lower-than-expected concentrations at the low end.
- Work quickly once diluted. The longer diluted peptide sits in the tube before the assay starts, the more sticks to the walls.
For more on solubility challenges during preparation, the peptide solubility testing protocols guide covers solvent selection and surfactant strategies relevant to keeping working concentrations accurate.
[PERSONAL EXPERIENCE] In practice, we always prepare a parallel single-concentration reference tube at a mid-range point in the series and run it in duplicate at the start and end of a plate. If both values agree within 5% of nominal, we accept the series. If they diverge, we re-prepare before using the full plate.
Designing a dilution scheme that does not set you up to fail
Avoiding peptide dilution series concentration errors starts before you prepare the first tube. Plan the full scheme on paper or in a spreadsheet. Write down the top concentration, the number of points, the dilution factor at each step, and the final volume you need per well in your assay plate. Then back-calculate how much to prepare at each step, adding at least 20% extra. Running out of material halfway through forces you to restart from an intermediate tube, which is an uncontrolled rescue that introduces unknown error.
- Choose a dilution factor based on the concentration range you need to cover. A 1:3 scheme (half-log steps) gives more data points across a narrow range. A 1:10 scheme spans more orders of magnitude with fewer tubes.
- Limit chain length. Every step multiplies all prior errors. If you need very broad coverage, prepare two independent series from the original stock rather than extending a single chain.
- Include a zero-concentration vehicle control — a tube that goes through the same number of steps as the peptide series but contains only buffer. This lets you subtract any background signal the diluent itself contributes.
The purity of your starting material matters at every step downstream. Impurities in the stock add competing signals and inflate the apparent active mass, shifting derived concentration values. Alpha Peptides supplies research peptides with third-party verified certificates of analysis, so you have accurate purity data to correct your nominal concentration before calculating the dilution scheme. Browse the full catalog at alpha-peptides.com/shop/.
Verification checkpoints: confirming your series before committing a full plate
No dilution protocol is verified until at least one independent measurement confirms a concentration within the series. For peptides with meaningful UV absorbance, a quick reading on a NanoDrop (UV spectrophotometer) at the stock or first dilution step gives a fast mass-balance check. For peptides that do not absorb UV well, running duplicates at a single mid-range concentration in the same assay serves as an internal reference.
When the full dose-response curve is available, its shape tells you a lot. A correctly prepared series produces a smooth S-shaped curve with clear top and bottom plateaus. A curve with a premature flat bottom, an unusually steep slope, or a hook effect at the highest concentrations usually points to a dilution error or a stock concentration that differs from the labeled value. These are not normal biological results — they are diagnostic signals worth investigating before drawing conclusions.
Frequently asked questions about peptide dilution series preparation
What is the most common cause of peptide dilution series concentration errors in practice?
Units mismatches during stock concentration calculation are the single most common root cause of peptide dilution series concentration errors, followed by inadequate mixing between steps. Both produce consistent offsets across the series rather than random scatter, which is why they often go undetected until cross-laboratory comparisons reveal them.
How do I calculate the volume to transfer for each step in a serial dilution?
Use C1V1 = C2V2 rearranged to V1 = (C2 x V2) / C1, where V2 is your target final volume in the destination tube. For a 1:10 dilution into 1 mL total, V1 = 100 µL; the buffer volume is V2 minus V1, or 900 µL. Always calculate the buffer volume as the difference rather than approximating it, especially when transfer volumes exceed 5% of the final volume.
At what concentration does surface adsorption become a significant concern for peptides?
Surface adsorption to standard plastic labware becomes measurable below roughly 100 nM and can represent 20 to 40% of total peptide mass below 1 nM, depending on peptide hydrophobicity, charge, and diluent composition. Switching to low-binding tubes and adding carrier protein to the diluent substantially reduces this effect at the lowest concentrations in a series.
Is it acceptable to restart a serial dilution series from an intermediate tube if I run out of material?
Technically possible, but only if you verify the concentration of that intermediate tube before continuing — do not assume it is at nominal. Any accumulated error in that tube will carry into all subsequent steps, and there is no way to separate that from a real biological effect in the resulting curve. Preparing sufficient volume at every step with an intentional overage is a better approach than relying on mid-series rescues.
For research use only. Not for human consumption. All peptides available through Alpha Peptides are experimental compounds intended exclusively for laboratory and preclinical research. Explore the full catalog at alpha-peptides.com/shop/ and review Certificates of Analysis.