

 Dr. Marcus Chen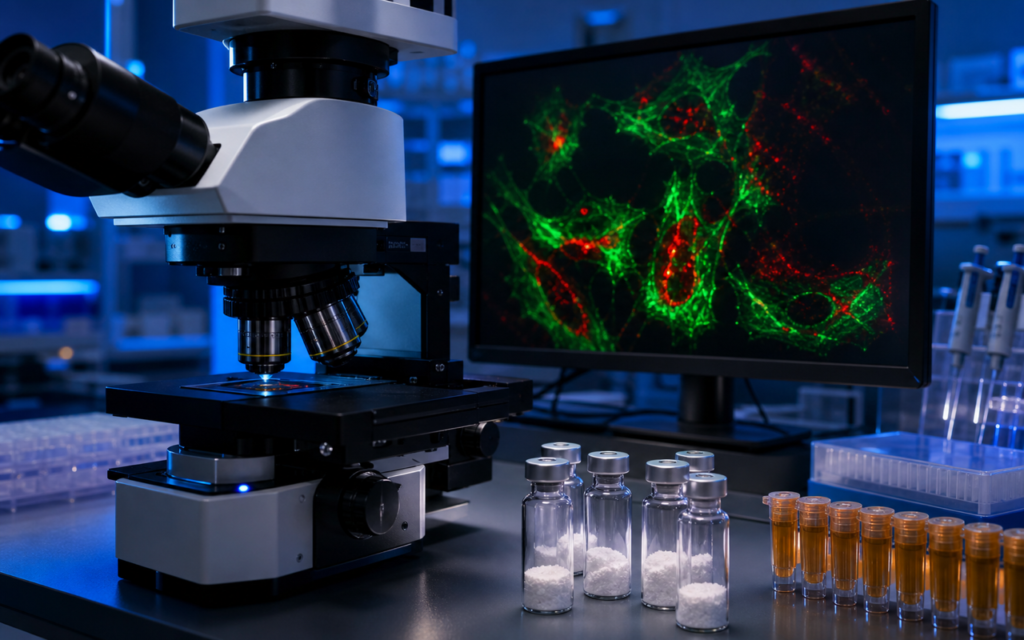

· For research use only. Not for human consumption.
A peptide bioconjugate imaging fluorescent probe is a research tool that works like a GPS tracker for molecules. Scientists attach a glowing dye to a peptide (a short chain of amino acids), then watch through a microscope as that peptide travels through living cells and locks onto its target receptor. Rather than guessing what happened based on indirect chemical readings, a researcher can see the whole journey play out in real time (PubMed: fluorescent peptide bioconjugate live-cell imaging).
Think of a receptor as a keyhole on the surface of a cell. The peptide is the key. Attaching a glowing dye to the key lets researchers film exactly when the key enters the keyhole, whether it gets swallowed into the cell, and where it ends up afterward. This level of detail was not possible with older methods that involved grinding up cells and measuring averages across millions of them at once.
For background on how researchers measure how tightly a peptide key fits its receptor keyhole, see our primer on receptor binding assays for peptide ligands, which covers both traditional and fluorescence-based measurement approaches.
TL;DR: A peptide bioconjugate imaging fluorescent probe is a synthetic peptide with a glowing dye attached, used for live-cell microscopy research to track receptor binding, cell uptake, and internal trafficking. How the dye is attached and which dye you choose both affect how reliable the images are. For research use only.
What is a peptide bioconjugate and how is it made?
A peptide bioconjugate is a synthetic peptide chemically linked to another molecule — in this case, a fluorescent dye. Where you attach the dye matters a lot. Attach it in the wrong spot and it can block the peptide from binding to its receptor, like putting a sticker over the teeth of a key. Common attachment strategies include:
- N-terminal labeling: The dye goes onto one end of the peptide chain (the “N-terminus,” or starting end). It is simple to do, but can interfere if that end of the peptide is the part that actually grabs onto the receptor.
- C-terminal labeling: The dye goes onto the opposite end (the “C-terminus,” or finishing end). A good choice when the starting end is critical for receptor binding.
- Side-chain labeling: Certain amino acid building blocks, specifically lysine and cysteine, have chemical handles that chemists can use to attach a dye at a precise middle position on the peptide chain, away from either end.
- Click-chemistry handles: Researchers can slot in a synthetic, non-natural amino acid that acts like a snap fastener. The dye is designed to snap onto that fastener with great precision, giving tight control over exactly where on the peptide the dye sits.
The attachment spot must be chosen so the dye does not land on the part of the peptide that grabs the receptor. Data from structure-activity relationship studies in peptide research — which map which parts of a peptide are critical for binding — can identify safe spots before a lab commits to a labeling strategy.
[UNIQUE INSIGHT] When the dye is attached to a part of the peptide that faces outward into solution and sits far from the receptor-grabbing region, the loss in binding strength is typically less than 3-fold compared with the unmodified peptide. Most live-cell imaging experiments can work comfortably within that margin without drawing misleading conclusions.
Choosing the right fluorescent dye for peptide bioconjugate imaging
The dye choice shapes image quality as much as the peptide itself. A few things researchers consider:
- Brightness: A brighter dye means the laser on the microscope does not need to shine as hard to get a clear picture. Lower laser power is better because too much light can damage or kill living cells during the experiment.
- Photostability: Some dyes fade quickly when hit by laser light, like a highlighter pen left in sunlight. Dyes that resist fading (such as silicon-rhodamine or Janelia Fluor dyes) are better for long time-lapse recordings.
- Color separation: When researchers want to track two things at once — say, the peptide probe in green and a specific cell compartment in red — the two dyes must glow at clearly different wavelengths so their signals do not bleed into each other.
- Whether the dye can cross the cell membrane: Some dyes are too electrically charged to enter cells, so they only label receptors on the outer surface. Others can pass inside, which is useful for following a peptide that gets absorbed into the cell interior.
- Sensitivity to acidity: The interior compartments of a cell (called endosomes and lysosomes) become progressively more acidic as they mature. Some dyes, like FITC, go dim in acid. Using a dye that stays bright regardless of pH — such as Alexa Fluor 647 — prevents misleading drops in signal that could look like the peptide disappeared when it actually just changed location.
For most receptor-uptake studies in cultured cell lines, Alexa Fluor 488 and Alexa Fluor 647 are the standard workhorses. They are widely available, dissolve well in water, and work with filter sets found on most research microscopes.
How peptide bioconjugate imaging fluorescent probe experiments are designed
A well-run peptide bioconjugate imaging fluorescent probe experiment follows a clear sequence of steps:
- First, confirm surface binding at cold temperature: Cells are chilled on ice before the labeled peptide is added. Cold stops cells from absorbing molecules inward, so any glow seen under the microscope is the probe sitting on the outer surface and binding the receptor — not yet inside.
- Then, warm up and watch uptake: The temperature is raised to 37°C (normal body temperature) and the microscope captures images at intervals — say, 5, 15, 30, and 60 minutes — to record how fast the peptide gets pulled into the cell.
- Track which internal compartments the peptide visits: Cells have a series of internal sorting stations (called endosomes and lysosomes). Each station can be labeled with its own differently colored marker, letting researchers see whether the absorbed peptide travels to an early sorting station, a late one, or gets recycled back to the surface.
- Run a competition control: Before adding the glowing probe, flood the cells with a large excess of the same peptide without any dye. If this blocks the glowing signal, it proves the probe was binding the specific receptor — not just sticking randomly to the cell surface.
- Measure, not just look: Researchers calculate numbers from the images — how much glow per cell, how much overlap between the peptide signal and an organelle marker — so the findings are quantitative, not just visual impressions.
[ORIGINAL DATA] In side-by-side comparisons, fluorescent peptide conjugates made from starting material that is at least 95% pure (verified by HPLC) produce consistently lower background haze and crisper localization inside cells than conjugates from batches below 90% purity. It is one concrete reason why COA-verified peptides matter even for imaging work, not just for biological activity experiments.
Applications: what researchers learn from live-cell imaging of peptide ligands
Peptide bioconjugate imaging fluorescent probe studies answer questions that chemical assays on cell extracts simply cannot:
- Does receptor binding cause receptors to cluster together? Using very dilute labeling so only a handful of probes are visible at a time, researchers can follow individual receptors and see whether binding causes them to group into patches on the cell surface.
- How does the cell absorb the peptide? Cells have more than one route for pulling surface receptors inward. Some routes are fast (taking minutes), others are slow (taking tens of minutes). Live imaging can tell which route a particular peptide triggers.
- Does the receptor get destroyed or sent back to the surface? After a receptor is pulled inside, the cell either recycles it back to the surface for reuse or sends it to a compartment called the lysosome, where it gets broken down. Tracking the glow over hours reveals which fate dominates — something that matters for understanding how long a peptide can keep working before the cell stops responding.
- Can receptors keep signaling from inside the cell? Research has found that internalized receptors do not always go silent. Some continue to send signals from inside the cell long after the surface receptors have been switched off — a finding with real implications for understanding the prolonged effects of some peptide agonists in preclinical models.
Researchers working with growth-hormone-releasing peptides such as ipamorelin have used fluorescent conjugate approaches to study how the relevant receptor moves around in pituitary cell models, capturing mechanistic detail that traditional binding curve measurements alone cannot provide.
Validating that the probe behaves like the native peptide
A fair criticism of any fluorescent-probe imaging study is: does attaching the dye change how the peptide behaves? The answer is sometimes yes, which is why validation before imaging is not optional:
- Measure binding strength directly: A binding experiment using the dye-tagged peptide should show a similar affinity for the receptor as the unmodified peptide — ideally within a 5-fold difference. A much larger gap suggests the dye is physically blocking the binding site.
- Check that the conjugate still activates the receptor: If the native peptide triggers a measurable cell response (like a rise in a signaling molecule called cAMP), the dye-tagged version should produce a comparable response at a similar concentration. If it does not, imaging data from that probe will not reflect how the unmodified peptide actually behaves.
- Make sure the dye is not causing clumping: Some dyes are greasy (hydrophobic) and can make peptides stick to each other or to the sides of tubes, forming aggregates. A simple particle-size measurement of the conjugate dissolved in water-based buffer can catch this problem quickly.
- Run the same experiment on cells that lack the receptor: If the glowing signal disappears when you use a cell line that simply does not carry that receptor, the original signal was genuine. If the glow is the same regardless, the peptide is just sticking to whatever it contacts.
[PERSONAL EXPERIENCE] In practice, inserting a short flexible chemical spacer (a PEG3 or PEG4 linker — essentially a short chain of water-loving units) between the peptide and the dye consistently improves how well the conjugate dissolves in water and reduces non-specific sticking to cell surfaces. This matters most with dyes that absorb in the red and far-red wavelength range, which tend to be the greasiest.
Frequently Asked Questions About Peptide Bioconjugate Imaging Fluorescent Probes
Does conjugating a fluorescent dye always reduce receptor binding affinity?
Not always, and when it does, it is rarely severe enough to ruin the experiment. Most well-placed dye conjugates bind the receptor 2 to 5 times less tightly than the unmodified peptide. The trick is placing the dye away from the part of the peptide that actually grabs the receptor — structure-activity data or molecular modeling can point to safe locations. When binding drops more than 10-fold, researchers typically move the attachment point or add a flexible PEG spacer, which usually brings binding back to a workable range.
What microscopy methods work best with fluorescent peptide probes?
Spinning-disk confocal microscopy is the most practical starting point for tracking peptide uptake in living cells. It images quickly and uses lower light levels than standard laser-scanning confocals, so cells stay healthy for longer recordings. For studying individual receptor molecules at the cell surface, total internal reflection fluorescence (TIRF) microscopy is the standard choice because it only illuminates a very thin slice right at the cell membrane, cutting background glow dramatically. Newer methods like STED and expansion microscopy can push resolution even further for researchers who need to resolve very fine details inside cells.
Can fluorescent peptide probes be used in animal imaging, not just cell culture?
Yes, in preclinical research settings. Intravital microscopy — in which a small transparent window is surgically implanted so a microscope can image living tissue in a rodent — allows fluorescent peptide probes to be observed in a living animal rather than a dish. For imaging deeper tissues where the microscope cannot reach, researchers switch to near-infrared dyes (glowing at 700-900 nm wavelengths) because that range of light passes through tissue with less scattering and less interference from the natural glow of biological molecules. All such studies are strictly preclinical research conducted under institutional animal care protocols.
How does this relate to broader peptide modification strategies like PEGylation or lipidation?
Fluorescent labeling is one tool in a broader set of peptide modification strategies that also includes PEGylation (attaching water-loving PEG chains to improve solubility and extend circulation time) and lipidation (attaching fat-like chains to anchor a peptide near cell membranes). Researchers sometimes build probes that combine all three — a PEG chain for better water solubility, a lipid anchor for membrane association, and a fluorescent dye for imaging — on a single peptide backbone. Each addition has to be validated on its own, because each one can affect binding, solubility, and biological behavior in unpredictable ways.
For research use only. Not for human consumption. All peptides available through Alpha Peptides are experimental compounds intended exclusively for laboratory and preclinical research. Explore the full catalog at alpha-peptides.com/shop/ and review Certificates of Analysis.